| 3D-files-to-print | ||
| ESP32 | ||
| img | ||
| streamdeck-plugin | ||
| .gitignore | ||
| README.md | ||
Table of Content
- What's this project?
- Web UI
- Stream Deck plug-in
- BusyLight API
- MuteDeck integration
- Electronic parts
- Firmware installation
- 3D files - Enclosure
- Wiring / Soldering
- Tools & libs
What's this project?
Let people know if they can bother you with light signals!
A cheap, simple to build, nice looking and portable DIY Busy Light.
It comes with a with a rudimentary (and ugly) Web UI and a simple (but hopefully convenient) Rest API.
| Controlled by Stream Deck with REST API | Light roll |
|---|---|
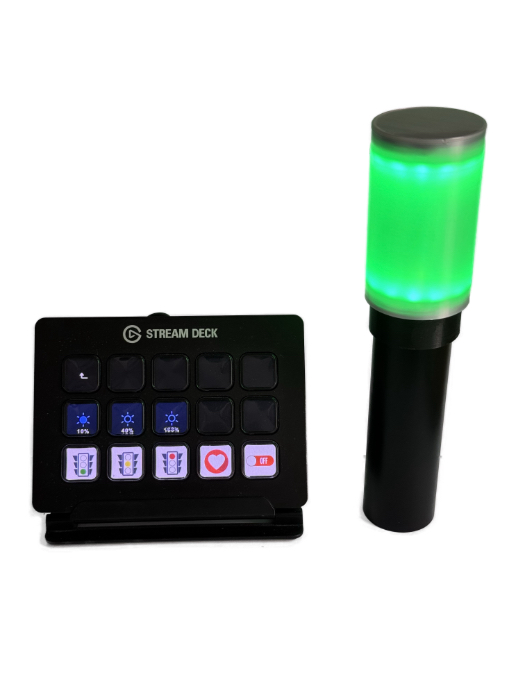 |
 |
Web UI
A very simplistic (and ugly) UI is available on port 80.
Default hostname is igox-busylight.
You can try to reach the web UI @ http://igox-busylight.local.
| What an ugly UI ! 😄 |
|---|
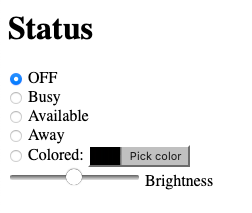 |
Stream Deck plug-in
You can download a Stream Deck plugin to control your BusyLight:

Or directly from here.
BusyLight API
End points
| Path | Method | Parameter | Description |
|---|---|---|---|
| /api/color | POST | color JSON object |
Set the BusyLight color according to the color object passed in the request body. Return a status object. |
| /api/color | GET | n/a | Retreive the color currently displyed by the BusyLight. Return a color object. |
| /api/brightness | POST | brightness JSON object |
Set the BusyLight brightness according to the brightness object passed in the request body. Return a status object. |
| /api/brightness | GET | n/a | Retreive the BusyLight brightness. Return a brightness object. |
| /api/status/on | POST / GET | n/a | Light up the BusyLight. White color. Return a status object. |
| /api/status/available | POST / GET | n/a | Set the BusyLight in available mode. Green color. Return a status object. |
| /api/status/away | POST / GET | n/a | Set the BusyLight in away mode. Yellow color. Return a status object. |
| /api/status/busy | POST / GET | n/a | Set the BusyLight in busy mode. Red color. Return a status object. |
| /api/status/off | POST / GET | n/a | Shutdown the BusyLight. Return a status object. |
| /api/status | GET | n/a | Retreive the current BusyLight status. Return a status object. |
| /api/debug | GET | n/a | Retreive the full BusyLight status. |
JSON objects
color object
{
  "r": 255,
  "g": 0,
  "b": 127,
  "brightness": 0.5
}
r: RED color | integer | [0 .. 255]
g: GREEN color | integer | [0 .. 255]
b: BLUE color | integer | [0 .. 255]
brightness: LED brighness (optional) | float | [0.0 .. 1.0]
brightness object
{
  "brightness": 0.5
}
brightness: LED brighness | float | [0.0 .. 1.0]
status object
{
  "status": "<STATUS>"
}
<STATUS> : on | off | available | away | busy | colored
MuteDeck integration
The POST api/mutedeck-webhook endpoint aims to collect MuteDeck webhook callbacks.
It will automatically switch to the BusyLight in:
- busy mode (Red color) when entering a meeting with Mic
ONand cameraON. - away mode (Yellow color) when entering a meeting with Mic
OFFand cameraON. - away mode (Yellow color) if the mic is muted during a meeting.
- available mode (Green color) when exiting/closing a meeting.
| MuteDeck Configuration |
|---|
 |
Electronic parts
| Parts | Links (Amazon - not affiliated) |
|---|---|
| Micro-controler | D1 ESP32 Mini NodeMCU - USB C version |
| Led rings (x2) | AZDelivery 5 x LED Ring 5V RGB compatible avec WS2812B 12-Bit 38mm |
| Battery | Anker PowerCore 5000mAh |
| USB A to USB C adapter | USB A to USB C adapter |
Firmware installation
(1) Flash your ESP32 with Micropython.
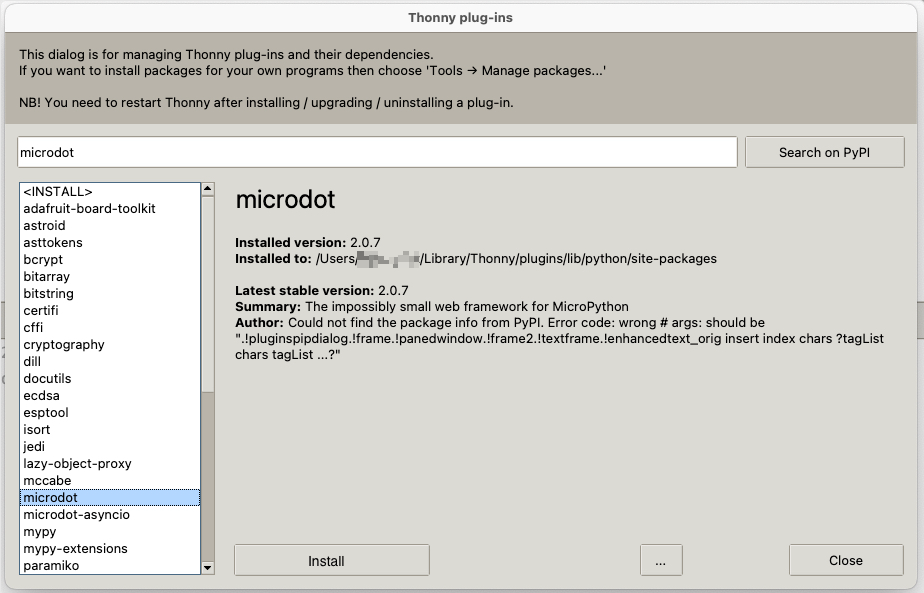
(2) Install microdot library on the ESP32. This can easily be done using Thonny:
| Tools > Manage plug-ins | lib selection |
|---|---|
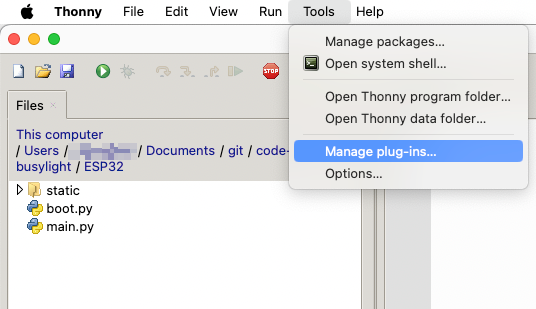 |
 |
(3) Edit the WIFI Configuration section in the boot.py file.
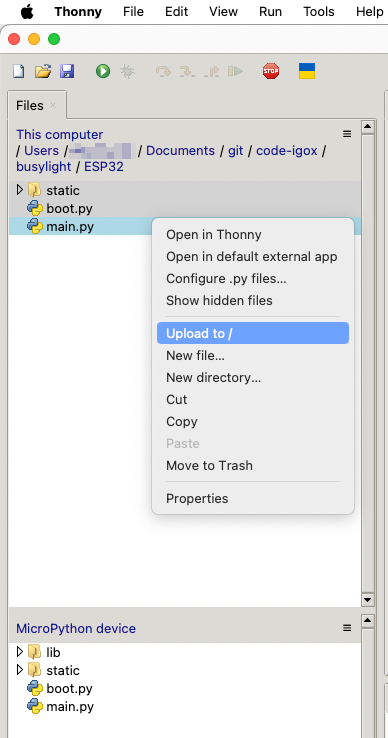
(4) Copy the content of ESP32 folder with the modified boot.py file to the root of your ESP32 file system. Again, can easily be done using Thonny:
Done!
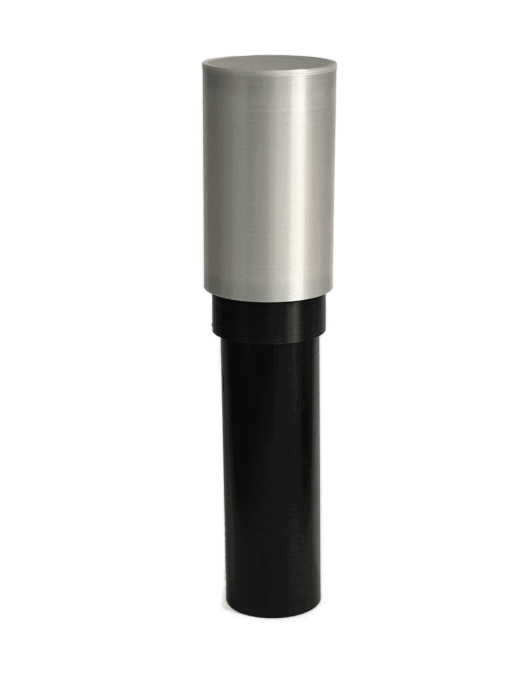
3D files - Enclosure
All the required 3D files (STLs and f3d project) to 3D print the enclosure are available in the 3D-files-to-print folder.
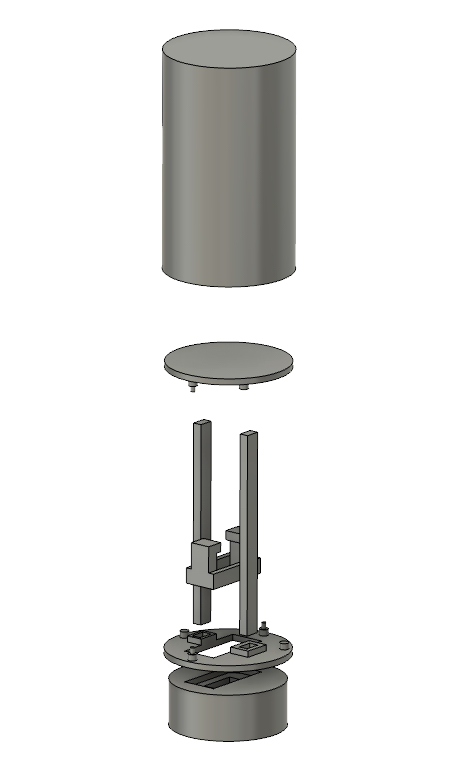
Wiring / Soldering

You can see a final assembly image here.
Tools & libs
Thonny
Micropython
Microdot
https://microdot.readthedocs.io/en/latest/index.html